ข้ามไปยังเนื้อหาหลัก

How to directly download files from Dropbox, or Google drive using wget in Terminal or in Google Colaboratory.

· อ่าน 3 นาที
Kobkrit Viriyayudhakorn
CEO, iApp Technology

How to directly download files from Dropbox, or Google drive using wget in Terminal or in Google Colaboratory.​

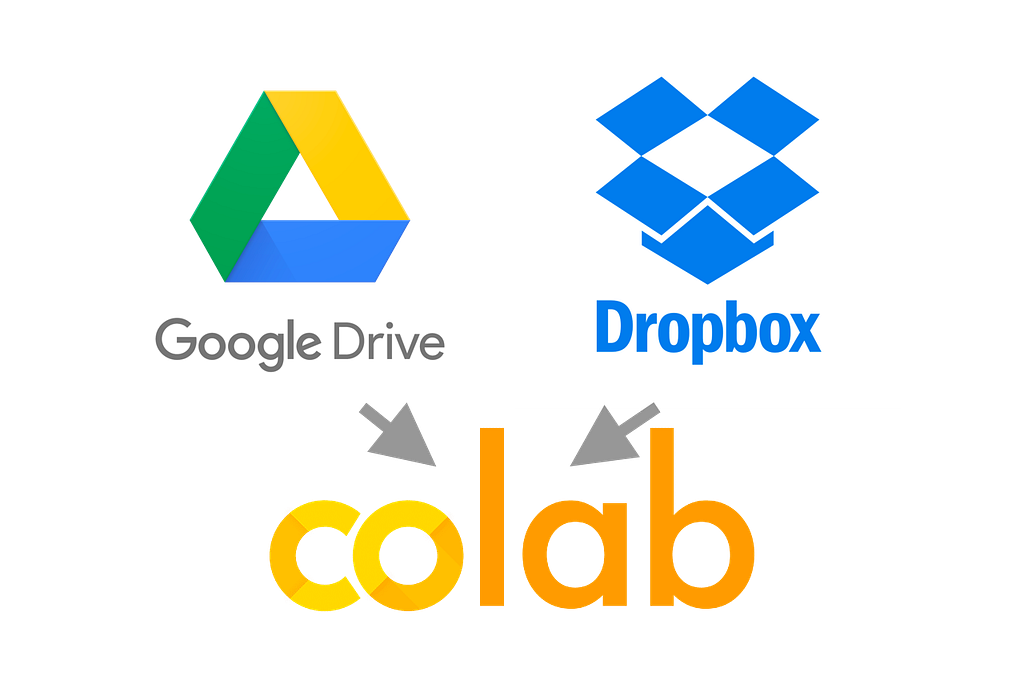
Google Colaboratory is a great tool for data science and machine learning practitioners nowsday. Since a Google Colaboratory is a GPU-enable remote compute instance running on Google Cloud. It does not locally run on our machine. It is quite difficult to upload the dataset or any CSV files into the remote instance.

The easiest way to do is, we upload our files to the Public folder in the Dropbox. We copy the public link and download it using command as follow.

# Dropbox​

# Dropbox


## Google Colaboratory


!wget -O news.csv <https://www.dropbox.com/s/XXXXXXX/news.csv?dl=0>


## Terminal, Command Line


$ wget -O news.csv <https://www.dropbox.com/s/XXXXXXX/news.csv?dl=0>

# Google Drive​

Unfortunately, in Google drive is not easy like in the Dropbox, the Google drive does not provide direct public link that allow us to fetch the file directly. When you turn on the Link Sharing, They usually provide us the virtual path like this.

[https://drive.google.com/open?id=XXXXXXXXXXXXX](<https://drive.google.com/open?id=1opkctEFmJ8E08PRzaiqNrEyUZcbXegsJ>)XXXXXXXXXXX

Since our team using Google drive as the primary source of file sharing, we need to think the solution for it.

Luckily there is a tool called Gdown (https://github.com/circulosmeos/gdown.pl). You can install via pip. It can directly download file from the Google drive virtual path for us, we can use in the command as follows.

# Google Drive


## Google Colabratory


!gdown --id XXXXXXXXXXXXXXXXX


## Terminal, Command Line


$ pip install gdown


$ gdown --id XXXXXXXXXXXXXXXXX

Note that you need to extract the “XXXXXXXXXXXX” part from the virtual link provided from Google drive by yourself.

Does this blog article helpful?? If yes, please help us press a Clap hand button and press a purple Follow button for getting helpful tips on Artificial Intelligence, Data Science, Machine Learning and Computer Science from iApp Technologyand kobkrit.com

For those whoever want to develop and get consult on creating your own AI model, please getting more information at our company website “iApp Technology” (https://iapp.co.th) and testing our AI demoes (https://ai.iapp.co.th). You can contact me directly at kobkrit@iapp.co.th. Thank you very much. #iApp #Ai

See more at https://iapp.co.th and https://ai.iapp.co.th


How to directly download files from Dropbox, or Google drive using wget in Terminal or in Google… was originally published in Kobkrit on Medium, where people are continuing the conversation by highlighting and responding to this story.

Using allow_growth memory option in Tensorflow and Keras

· อ่าน 2 นาที
Kobkrit Viriyayudhakorn
CEO, iApp Technology

1

We faced a problem when we have a GPU computer that shared with multiple users. Most users run their GPU process without the “allow_growth” option in their Tensorflow or Keras environments. It causes the memory of a graphics card will be fully allocated to that process. In reality, it is might need only the fraction of memory for operating. It prevents any new GPU process which consumes a GPU memory to be run on the same machine.

Example of three processes which can shared in two graphic cards enabled by “allow_growth” option.

To cove with this, They just enable the “allow_growth” setting in Tensorflow or Keras. The following code for setting allow_growth memory option in Tensorflow.

# Tensorflow  
import tensorflow as tf
config = tf.ConfigProto()
config.gpu_options.allow_growth = True
session = tf.Session(config=config, ...)

And for Keras

#For Kerasfrom keras.callbacks import ModelCheckpoint  
from keras.models import Model, load_model, save_model, Sequential
from keras.layers import Dense, Activation, Dropout, Input, Masking, TimeDistributed, LSTM, Conv1D
from keras.layers import GRU, Bidirectional, BatchNormalization, Reshape
from keras.optimizers import Adamfrom keras.backend.tensorflow_backend import set_session
import tensorflow as tf
config = tf.ConfigProto()
config.gpu_options.allow_growth = True # dynamically grow the memory used on the GPU
config.log_device_placement = True # to log device placement (on which device the operation ran)sess = tf.Session(config=config)set_session(sess) # set this TensorFlow session as the default session for Keras

This increase the graphics cards utilization, not limited the number of process to the amount of card that host machine have. :)

For those whoever want to develop and get consult on creating your own AI model, please getting more information at our company website “iApp Technology” (https://iapp.co.th) and testing our AI demoes (https://ai.iapp.co.th). You can contact me directly at kobkrit@iapp.co.th. Thank you very much. #iApp #Ai

See more at https://iapp.co.th and https://ai.iapp.co.th

Shrink Disk in Google Cloud Platform on Ubuntu With The Smallest Effort Possible

· อ่าน 3 นาที
Kobkrit Viriyayudhakorn
CEO, iApp Technology

Like everyone else, when you creating a disk for an instance, we usually allocate the size of disk much much higher than we actually need. We have a very pessimistic view on a disk space we need, and finally, we end up wasting money on unnecessary matters.

I created an instance on GCP, aimed for running several docker containers. I create an extra 500GB drive located in /dev/sdb (to be mounted on /var/lib/docker) attached to my instance, but actually, an only 60GB drive is needed. The following steps are for shrinking a disk for the unmountable partition.

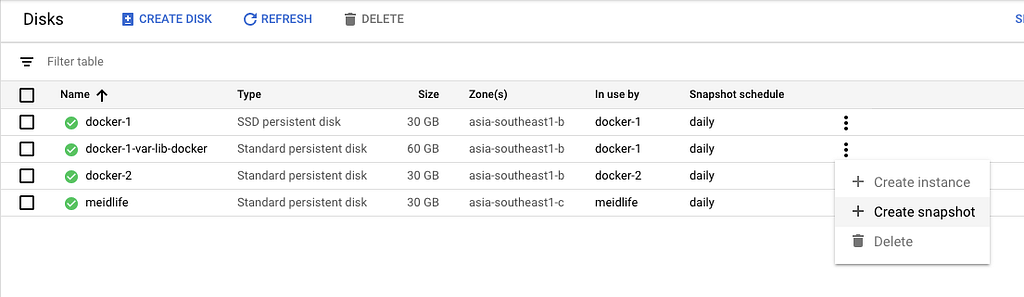
  1. Make the snapshot of a disk for backup in GCP (Actually docker-1-var-lib-docker is originally 500GB)

2. Down your docker in Ubuntu, $ sudo service docker stop

3. Umount the old disk, $ sudo umount /dev/sdb

4. Resize it, $ sudo resize2fs /dev/sdb 60G You need to wait a while.

5. Edit its partition table, $ sudo cfdisk /dev/sdb will give you a text-based gui to inspect your partition table. I would recommend you to print the partition table to a file or screen at that point, and take note of the current configuration as backup. You can then select /dev/sdb and delete the partition. In its place, free space will be displayed. Use new to create a new partition with 60 GB in its place, and set the type to ext4. Then, move to the trailing free space and create the 440GB swap partition with type swap.

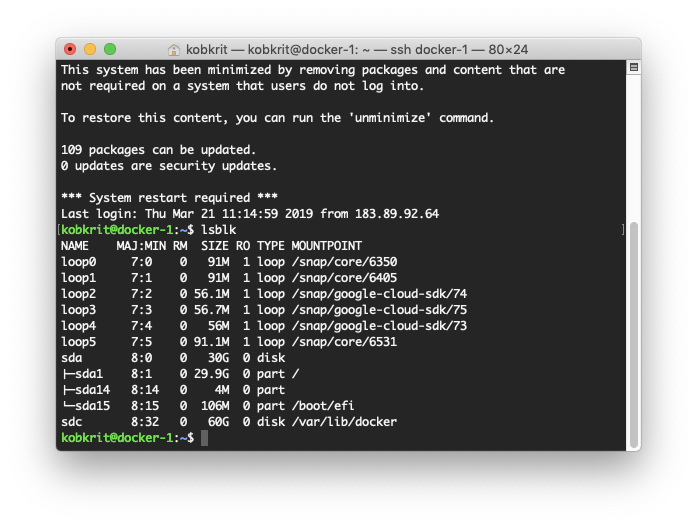
6. Create a new disk in GCP with the size of 60GB attached with the instance. It will be on /dev/sdc, you can view it by $ lsblk (The image is taken after the process is done.)

7. Finally clone the disk, dd if=/dev/sdb of=/dev/sdc (It will take a while)

8. Try to mount /dev/sdc on /var/lib/docker instead of the old disk mount /dev/sdc /var/lib/docker

9. Start the docker service $ sudo service docker start

10. Hooray!, Now everything works with the smaller disk need.

11. Get rid of the old disk on GCP. We do not need to pay from them anymore.

In summary, we unmount a disk, shrink the disk, edit the partition table, and then using dd to clone disk from the old to the new. Finally, mount the new on the old’s mount point and finally, we can get rid of the old disk.

Hope this guide saves your time.

Thank you.

For those whoever want to develop and get consult on creating your own AI model, please getting more information at our company website “iApp Technology” (https://iapp.co.th) and testing our AI demoes (https://ai.iapp.co.th). You can contact me directly at kobkrit@iapp.co.th. Thank you very much. #iApp #Ai

See more at https://iapp.co.th and https://ai.iapp.co.th


Shrink Disk in Google Cloud Platform on Ubuntu With The Smallest Effort Possible was originally published in Kobkrit on Medium, where people are continuing the conversation by highlighting and responding to this story.

How Emoticon Affects Chatbot Users

· อ่าน 2 นาที
Kobkrit Viriyayudhakorn
CEO, iApp Technology

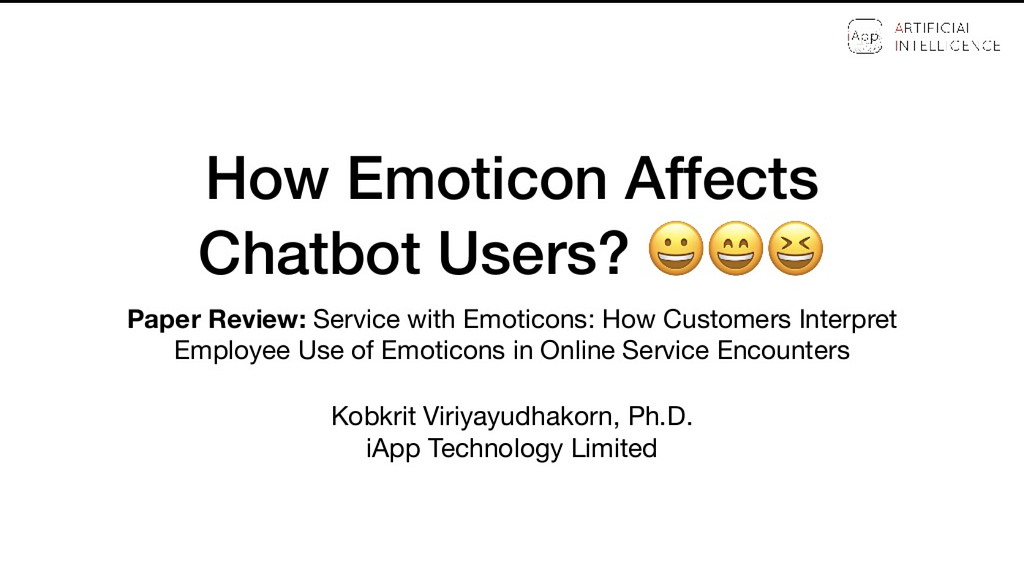
Hello, I am Kobkrit. Today I have just read an interesting academic paper on a digital psychology, “Service with Emoticon: How Customer Interpret Employee Use of Emoticons in Online Service Encounters”. I summarized it as follows.

Suitable use of Emoticon​

Industries
Suitable Industries
: Business care on friendship and association (Clubs, Entertainments)
Unsuitable Industries : Business care on professionalism (Bank, Lawyer)

**Customers
Suitable Customers: **Simple Slow-life, Relax, Unenthusiastic, Satisfied.
Unsuitable Customers: Professionalism, Busy, Stressful, Very ambitious.

**Situations
Suitable Situations: **Using it in free-offer, extra-role services.
Unsuitable Situations: Receiving Complaints.

You can read it in full detail below..

https://medium.com/media/aca9c9bbf06d60380c22959648a01329/href

Full Paper URL: https://academic.oup.com/jcr/article-abstract/45/5/973/4924869

For those whoever want to develop and get consult on creating your own AI model or Chatbot , please getting more information at our company website “iApp Technology” (https://iapp.co.th) and testing our AI demoes (https://ai.iapp.co.th). You can contact me directly at kobkrit@iapp.co.th. Thank you very much. #iApp #Ai

See more at https://iapp.co.th and https://ai.iapp.co.th


How Emoticon Affects Chatbot Users was originally published in Kobkrit on Medium, where people are continuing the conversation by highlighting and responding to this story.

การพัฒนาระบบหุ่นยนต์โต้ตอบสนทนาอัตโนมัติภาษาไทย (Chatbot) ด้วย Dialogflow

· อ่าน 8 นาที
Kobkrit Viriyayudhakorn
CEO, iApp Technology

1

การพัฒนาระบบหุ่นยนต์โต้ตอบสนทนาอัตโนมัติ (Chatbot Agent) นั้น, สามารถทำได้โดยการแปลงคำพูดของผู้ใช้ที่ใช้ภาษาธรรมชาติ อาทิเช่น ภาษาไทยหรือภาษาอังกฤษ (Query) ให้เป็นข้อมูลที่สามารถประมวลผลได้ (Intent). โดยที่การแปลงนี้ (Intent Classification) เกิดขึ้นเมื่อผู้ใช้ป้อนข้อมูล ที่ใกล้เคียงหรือตรงกับกับข้อมูลคำพูด (Training Phase) ของหนึ่งในเจตนา (Intent) ที่นักพัฒนาโปรแกรมกำหนดไว้. เจตนาเหล่านั้นเป็นหัวข้อที่ใช้ดำเนินการตามคำพูดของผู้ใช้.

หุ่นยนต์โต้ตอบอัตโนมัติสามารถออกแบบมาเพื่อจัดการการสนทนา ด้วยความช่วยเหลือจากข้อมูลบริบท (Context), ลำดับความสำคัญของเจตนา (Intent Priority), การดึงข้อมูลสำคัญจากคำพูดของผู้ใช้ (Action and Parameters). นอกจากนี้ยังเปิดให้นักพัฒนาเขียนโปรแกรม (Code) เสริมเพื่อการประมวลผลเพิ่มเติมได้ ผ่านช่องทางเชื่อมต่อต่างๆ อาทิเช่น Webhook หรือ Fulfillment. ซึ่งแผนภาพต่อไปนี้แสดงการจัดการคำขอของผู้ใช้เมื่อมีผู้ใช้ส่งคำพูดมายังระบบหุ่นยนต์โต้ตอบสนทนาอัตโนมัติ.

เมื่อผู้ใช้ส่งข้อความมาผ่านโปรแกรมสนทนา (Chat Messenger) หรือเสียงผ่านไมโครโฟน (Microphone) จากอุปกรณ์ต่างๆ ซึ่งเสียงจะถูกแปลงเป็นข้อความด้วยโปรแกรมรู้จำคำพูด (Speech Recognition) แล้วนั้น. ข้อความคำพูดของผู้ใช้เหล่านี้ (Query) ก็จะถูกแปลงเป็นหัวข้อเจตนา (Intent) โดยใช้เทคนิคทางปัญญาประดิษฐ์ที่ใช้คัดแยกเจตนาจากคำพูด (Intent Classification). โดยใช้ทำงานของโปรแกรมคัดแยกเจตนาจากคำพูดนั้น จะใช้หลักการเทียบความเหมือนกับความคล้ายของคำพูดของผู้ใช้ ว่าใกล้เคียงกับกลุ่มคำพูดตัวอย่างของเจตนานั้น (Training Phase) ซึ่งกำหนดไว้ล่วงหน้านั้นๆหรือไม่} โดยการพิจารณาหัวข้อเจตนา (Intent) ที่เหมาะสมนั้น เราสามารถใช้บริบท (Context) เป็นตัวกำหนดว่าเจตนาไหนจะถูกนำมาพิจารณาในการคัดเลือกบ้าง. โดยที่หากเจตนาไหนไม่ตรงกับบริบทที่กำหนดไว้ ก็จะไม่ถูกคัดเลือก ไม่ว่าจะมีกลุ่มคำพูดตัวอย่างใกล้เคียงกับคำพูดของผู้ใช้มากแค่ไหนก็ตาม.

หลังจากที่คัดเลือกเจตนาได้แล้ว, ระบบก็จะสามารถเลือกคำตอบที่เหมาะสม ซึ่งกำหนดไว้โดยนักพัฒนาระบบหุ่นยนต์โต้ตอบสนทนาอัตโนมัติ. ซึ่งอาจจะเป็นคำตอบตายตัว (Static Response) หรือ คำตอบแบบพลวัต (Dynamic Response) ที่สร้างจากการประมวลโปรแกรมเพิ่มเติม เขียนโดยนักพัฒนาเชื่อมต่อกับระบบหุ่นยนต์โต้ตอบสนทนาอัตโนมัติ (Chatbot Agent) ผ่านช่องทาง API (Fulfillment) ก็ได้. โดยนักพัฒนาระบบหุ่นยนต์โต้ตอบสนทนาอัตโนมัตินั้น สามารถเชื่อมหุ่นยนต์กับบริการ API ภายนอกอื่นๆ (External APIs). ซึ่งเป็นการเปิดช่องทางให้หุ่นยนต์ก็สามารถเชื่อมต่อกับระบบฐานข้อมูลภายนอกใดๆ (RDMS) ก็ได้. สามารถนำช่องทางนี้มาใช้การดึงหรือบันทึกข้อมูล ให้สามารถสร้างคำตอบข้อมูลแบบพลวัต ตรงตามความต้องการของผู้ใช้ได้อีกด้วย.

หลังจากนั้น, ข้อความตอบกลับของผู้ใช้ก็จะถูกส่งกลับไปยังโปรแกรมสนทนา หรือตอบกลับเป็นเสียงผ่านลำโพงผ่านโปรแกรมสังเคราะห์เสียง (Speech Synthesis) ไปยังอุปกรณ์ต่างๆได้อีกด้วย. ทำให้ครบองค์ประกอบการสนทนาระหว่างมนุษย์และหุ่นยนต์ ซึ่งขั้นตอนโดยสรุปนั้นก็คือ

  1. รับเข้าคำสนทนาจากมนุษย์ผ่านข้อความโดยตรง หรือข้อความรู้จำจากเสียงมนุษย์โดยใช้เทคโนโลยีรู้จำเสียงพูด (Speech Recognition)
  2. คัดแยกเจตนาจากคำพูด (Intent Classification) โดยพิจารณาจากกลุ่มคำพูดตัวอย่าง (Training Phase) และบริบท (Context)
  3. เมื่อเราได้เจตนาแล้วเราก็สามารถสร้างคำตอบที่เหมาะสมด้วยการไปดึงคำตอบที่กำหนดไว้ (Static Response) ของเจตนานั้นๆ. หรือ ส่งออกเป็นคำตอบแบบพลวัต (Dynamic Reponse) ซึ่งสร้างด้วยการประมวลผลโค้ด (Code) โดยสามารถไปดึงข้อมูลภายนอกที่ต้องการจะใช้จากฐานข้อมูลหรือบริการภายนอกต่างๆด้วยช่องทาง Fulfillment.
  4. ส่งคำตอบไปยังมนุษย์ โดยอาจจะเป็นข้อความหรือเป็นเสียงก็ได้ ผ่านเทคโนโลยีการสังเคราะห์เสียงจากข้อความ (Speech Synthesis)

เครื่องมือในการพัฒนาระบบหุ่นยนต์โต้ตอบสนทนาอัตโนมัติ​

เครื่องมือในการพัฒนาระบบหุ่นยนต์โต้ตอบสนทนาอัตโนมัตินั้น มีอยู่หลายเจ้าในตลาด อาทิเช่น

  • IBM Watson
  • Google Dialogflow (API.AI)
  • Microsoft Luis
  • Snips.ai
  • Wit.ai
  • Recast.ai
  • Amazon.lex

ในการคัดเลือกเครื่องมือในการพัฒนาระบบหุ่นยนต์โต้ตอบสนทนาอัตโนมัติสำหรับภาษาไทยนั้น ทางทีมงานวิจัยได้คำนึงถึงเรื่องในหลายๆด้านดังนี้

ความแม่นยำในการทำคัดแยกเจตนาจากคำพูด (Intent Classification)​

จากงานวิจัยประสิทธิภาพเครื่องมือในการพัฒนาระบบหุ่นยนต์โต้ตอบสนทนาอัตโนมัติโดย Konstantin Savenkov, co-Founder and CEO at Inten.to ในปีสิงหาคม 2017 นั้น [1] พบว่าเครื่องมือที่มีความแม่นยำในการทำคัดแยกเจตนาจากคำพูดสูงที่สุด 3 ลำดับแรกก็คือ (1) IBM Watson 0.997 (2) Google Dialogflow (API.AI) 0.996 และ (3) Microsoft Luis 0.992 โดยวัดจากค่า F1 Score เป็นหลัก

การสนับสนุนภาษาไทย​

เมื่อเราเข้าไปดูในเรื่องการสนับสนุนภาษาไทย พบว่ามีเพียงเครื่องมือสร้างในการพัฒนาระบบหุ่นยนต์โต้ตอบสนทนาอัตโนมัติจาก Google Dialogflow เท่านั้นที่มีการสนับสนุนภาษาไทย

ความสามารถในการเชื่อมต่อกับ Messenging Platform ที่หลากหลาย​

เมื่อเราเข้าไปดูในเรื่องความสามารถในการเชื่อมต่อกับ Messenging Platform ที่หลากหลาย เราก็พบว่า Google Dialogflow สามารถเชื่อมต่อกับเครือข่ายสังคม (Social Network) ต่างๆ มากที่สุดมากถึง 16 เจ้าด้วยกันดังภาพ ซึ่งรวมถึง Platform ยอดนิยมของคนไทยอย่าง Line และ Facebook Messenger อีกด้วย

ด้วยเหตุผลปัจจัยต่างๆข้างต้น ทางเราจึงได้เลือก Google Dialogflow เป็นเครื่องมือหลักในการพัฒนาระบบหุ่นยนต์โต้ตอบสนทนาอัตโนมัติ

วิธีการพัฒนา Chatbot ด้วย Dialogflow​

วิธีการสร้างเอเจ้นท์ (Agent Creation)​

เริ่มจากทางผู้พัฒนาได้ทำการเข้าเว็บไซด์ https://dialogflow.com เพื่อทำการสร้างหุ่นยนต์โต้ตอบสนทนาอัตโนมัติโดยทำตามขั้นตอนดังนี้

  1. เข้าเว็บไซด์ https://dialogflow.com/

  2. กดที่ “Go to Console” ที่มุมขวาบน

  3. เข้าสู่ระบบด้วย Account ของ Google

  4. กดสร้างบอทใหม่ด้วยกดที่ปุ่มลูกศรลง (v) แล้วกดที่ปุ่ม (+) Create new agent

3. ตั้งชื่อบอทที่พื้นที่สีแดงด้านบน (ในที่นี้คือ “ElderBot” ต้องเป็นภาษาอังกฤษเท่านั้น ภาษาไทยมันจะสร้างไม่ได้ ไม่ขึ้น Error ให้ด้วย =_=) เลือกภาษาให้เป็นภาษาไทยในพื้นที่สีน้ำเงิน (Thai) และกดสร้างในพื้นที่สีเขียว (Create) เพื่อเริ่มสร้างระบบหุ่นยนต์โต้ตอบสนทนาอัตโนมัติ

การกำหนดเจตนา Intent + ตัวอย่างคำพูด Training Phase + คำตอบกลับ Response​

  1. กดที่เมนู Intents (เจตนา) ที่เมนูด้านซ้ายก็จะเห็นรายการหัวข้อเจตนาด้านขวา ซึ่งโดยเริ่มต้น มีเจตนาดังนี้
  • Default Fallback Intent เจตนารองรับข้อผิดพลาด

เจตนารองรับข้อผิดพลาดคือเป็นเจตนาที่จะถูกคัดเลือกทุกครั้ง เมื่อไม่มีเจตนาอื่นๆ ในรายการใกล้เคียงกับคำพูดของผู้ใช้ใดๆเลย ซึ่งส่วนมากจะเป็นเจตนาที่บอกผู้ใช้ว่า “บอทไม่เข้าใจ” ให้ผู้ใช้ส่งข้อความเข้ามาใหม่อีกครั้ง

  • Default Welcome Intent เจตนาทักทายเริ่มต้น

จะเป็นเจตนาเริ่มต้นทุกครั้ง เมื่อผู้ใช้เข้าสู่โปรแกรมสนทนาพูดคุย หรือได้ทำการเปิดเครื่องอุปกรณ์เชื่อมต่อกับโปรแกรม Chatbot นี้

2. กดที่ “Create Intent”

3. ใส่ชื่อ Intent ว่า “headache” สำหรับเจตนาสำหรับผู้สูงอายุปวดหัว

4. ที่ Training Phases เป็นคำพูดใดๆ ที่บ่งบอกว่าปวดหัว อาทิเช่น “ปวดหัว”, “มึนหัว” แล้วกด Enter

5. ที่ Response ใส่คำตอบของบอท ที่ตอบกลับเมื่อทราบว่า ผู้ใช้มีเจตนาว่าปวดหัว อาทิเช่น “หนูสมใจรับทราบแล้วค่ะ หนูสมใจจะเรียกพยาบาลมาหานะคะ”

6. กด “Save”

การทดสอบหุ่นยนต์สนทนา (Testing Chatbot)​

เมื่อเราได้ทำพัฒนาหุ่นยนต์สนทนาเสร็จแล้ว เราสามารถทดสอบความสามารถของหุ่นยนต์โดยการพิมพ์ทดสอบที่พื้นที่ด้านขวา

  1. ลองพิมพ์ประโยคคำพูดง่ายๆ อาทิเช่น “ตอนนี้ปวดหัว” แล้วกด Enter
  2. ระบบก็จะทำการคัดเลือกเจตนาที่ใกล้เคียงที่สุด แล้วเลือกคำตอบที่กำหนดไว้ปรากฏขึ้นมา

Citation​

  1. https://www.slideshare.net/KonstantinSavenkov/nlu-intent-detection-benchmark-by-intento-august-2017

หากใครสนใจอยากจะพัฒนาหรือต้องการที่ปรึกษาด้าน AI สามารถเข้าไปดูผลงานของบริษัทเรา iApp Technology ได้ที่ https://iapp.co.th และ https://ai.iapp.co.th หรือติดต่อได้ที่ kobkrit@iapp.co.th ได้เลยนะครับ #Ai #iApp

https://ai.iapp.co.th

ดูเพิ่มเติมได้ที่ https://iapp.co.th และ https://ai.iapp.co.th :D
การสร้าง Chatbot ภาษาไทยด้วย DialogFlow + ThaiMC

· อ่าน 2 นาที
Kobkrit Viriyayudhakorn
CEO, iApp Technology

วันนี้ได้มีโอกาสได้ไปพูดเรื่องการสร้าง Chatbot ภาษาไทยที่ที่ทำการสมาคมปัญญาประดิษฐ์ให้น้องๆที่เข้าร่วมงานแข่งขัน AIROBIC 2018 มากกว่า 40 ท่าน งานนี้เป็นงาน AI Hackatron ชิงเงินรางวัลกว่า 800,000 บาท ใครสนใจก็เข้าไปดูได้ที่ http://airobic2018.aiat.or.th ได้เลยจ้า

Poster งานจ้า

งานนี้เลยถือโอกาสอบรมการสร้าง Chatbot ภาษาไทยด้วย DialogFlow แบบว่าครบ ละเอียดครบถ้วน ใช้ครบทุก Function โดยมีเนื้อหาดังนี้

**วิธีการสร้าง Chatbot ภาษาไทย
**(1) Bot Persona
(2) Chat Fuel
(3) DialogFlow
(4) DialogFlow: Intent
(5) DialogFlow: Training Phase
(6) DialogFlow: Response
(7) How DialogFlow Work?: Intent Classification
(8) DialogFlow: Context
(9) How DialogFlow Work?: Context
(10) DialogFlow: Integration with LINE
(11) DialogFlow: Fulfillment with iApp Thai Machine Comprehension (ThaiMC)
(12) DialogFlow: Fulfillment with Inline Editor on Firebase
(13) DialogFlow: How to Debug the Error and Improve the bot.
(14) Q/A

โดย ดร.กอบกฤตย์ วิริยะยุทธกร
Dr. Kobkrit Viriyayudhakorn
iApp Technology Limited (http://iapp.co.th)
kobkrit@iapp.co.th

เชิญรับชมได้เลยจ้า

รับชม Video ได้เลยจ้า

Presentation Slide:

การสร้าง Chatbot ภาษาไทยด้วย DialogFlow + ThaiMCการสร้าง Chatbot ภาษาไทย Dr. Kobkrit Viriyayudhakorn (kobkrit@iapp.co.th)docs.google.com​

**Source code for Dialogflow Fulfillment
**https://gist.github.com/kobkrit/cbc8818a6408ea2d56fa48c0ccad1e38

บรรยากาศงาน

หากใครสนใจอยากจะพัฒนาหรือต้องการที่ปรึกษาด้าน AI สามารถเข้าไปดูผลงานของบริษัทเรา iApp Technology ได้ที่ https://iapp.co.th และ https://ai.iapp.co.th หรือติดต่อได้ที่ kobkrit@iapp.co.th ได้เลยนะครับ #Ai #iApp

https://ai.iapp.co.th

ดูเพิ่มเติมได้ที่ https://iapp.co.th และ https://ai.iapp.co.th :D
Trick: How to significantly reduce NPM download time for NodeJS Web application on Docker image

· อ่าน 2 นาที
Kobkrit Viriyayudhakorn
CEO, iApp Technology

2

Docker made my life much easier! I put every web application project to its own docker container. Docker allows me to deploy web application server on any cloud or any service providers. We can customize the dependencies to any versions of libraries that we want to use, and also integrated well with any continuous integration tools (like Jenkins).

Docker is excellent, but, the biggest drawback of Docker compared to the traditional FTP upload to server, it requires significant amount of time to complies a docker image. Generally for moderate size of web application project, it takes about 6–8 minutes to produce an image.

Turn out, I found the way to optimize the time to produce an image, especially for NodeJS Web application. Most of docker image compile time is wasted due to NPM install. It contributes 95% of the time. With simple Dockerfile modification, I can reduce from 6 minute to 10 seconds for building an image if the dependencies is not changed.

Instead of writing Dockerfile in the popular format like this.

FROM node:9  
MAINTAINER Kobkrit Viriyayudhakorn (kobkrit@iapp.co.th)RUN mkdir -p /usr/src/app
WORKDIR /usr/src/app
COPY . /usr/src/app/
RUN npm installCMD [ "npm", "start" ]EXPOSE 4000

Change to this.

FROM node:9MAINTAINER Kobkrit Viriyayudhakorn (kobkrit@iapp.co.th)ADD package.json /tmp/package.json  
RUN cd /tmp && npm install
RUN mkdir -p /usr/src/app && cp -a /tmp/node_modules /usr/src/app/WORKDIR /usr/src/app
COPY . /usr/src/app/CMD [ "npm", "start" ]EXPOSE 4000

The key ideas is to change from running npm install every time when your web changes to running only when its dependencies changed. We caches the whole node_modules folder, and save it to a docker commit. If your dependencies are not changed, docker can reuse the old commit for building the new one, significantly saving your docker image building time!

The following are improvement in a real work.

I change to the new Dockerfile on build #6. I changed dependencies on build #8, and #11.

In build #1-#5, I used the first Dockerfile. I changed to the latter on build #6. In build #7, it has no dependencies changed, but in build #8, it has some dependencies change which need to re-run npm install.

[Lecture 1] AI and Deep Learning: Introduction

· อ่าน 1 นาที
Kobkrit Viriyayudhakorn
CEO, iApp Technology

This Lecture Note is a Colaboratory notebook run on Google Cloud Engine. To open it, you need to register to use the Colaboratory service by login with your Google account at https://research.google.com/colaboratory/unregistered.html.

After that, open the Lecture 1 notebook at:
https://drive.google.com/file/d/1Vibvn4m1cdIc8t0QvxQagNkkfQv76F8i/view?usp=sharing

Don’t forget to click at “Open with Colaboratory” at the top bar.