4 posts tagged with "cloud"

View all tags

How to directly download files from Dropbox, or Google drive using wget in Terminal or in Google Colaboratory.
· 3 min read
Kobkrit Viriyayudhakorn
CEO, iApp Technology

How to directly download files from Dropbox, or Google drive using wget in Terminal or in Google Colaboratory.
Google Colaboratory is a great tool for data science and machine learning practitioners nowsday. Since a Google Colaboratory is a GPU-enable remote compute instance running on Google Cloud. It does not locally run on our machine. It is quite difficult to upload the dataset or any CSV files into the remote instance.

The easiest way to do is, we upload our files to the Public folder in the Dropbox. We copy the public link and download it using command as follow.

# Dropbox

# Dropbox


## Google Colaboratory


!wget -O news.csv <https://www.dropbox.com/s/XXXXXXX/news.csv?dl=0>


## Terminal, Command Line


$ wget -O news.csv <https://www.dropbox.com/s/XXXXXXX/news.csv?dl=0>

# Google Drive

Unfortunately, in Google drive is not easy like in the Dropbox, the Google drive does not provide direct public link that allow us to fetch the file directly. When you turn on the Link Sharing, They usually provide us the virtual path like this.

[https://drive.google.com/open?id=XXXXXXXXXXXXX](<https://drive.google.com/open?id=1opkctEFmJ8E08PRzaiqNrEyUZcbXegsJ>)XXXXXXXXXXX

Since our team using Google drive as the primary source of file sharing, we need to think the solution for it.

Luckily there is a tool called Gdown (https://github.com/circulosmeos/gdown.pl). You can install via pip. It can directly download file from the Google drive virtual path for us, we can use in the command as follows.

# Google Drive


## Google Colabratory


!gdown --id XXXXXXXXXXXXXXXXX


## Terminal, Command Line


$ pip install gdown


$ gdown --id XXXXXXXXXXXXXXXXX

Note that you need to extract the “XXXXXXXXXXXX” part from the virtual link provided from Google drive by yourself.

Does this blog article helpful?? If yes, please help us press a Clap hand button and press a purple Follow button for getting helpful tips on Artificial Intelligence, Data Science, Machine Learning and Computer Science from iApp Technologyand kobkrit.com

For those whoever want to develop and get consult on creating your own AI model, please getting more information at our company website “iApp Technology” (https://iapp.co.th) and testing our AI demoes (https://ai.iapp.co.th). You can contact me directly at kobkrit@iapp.co.th. Thank you very much. #iApp #Ai

See more at https://iapp.co.th and https://ai.iapp.co.th


How to directly download files from Dropbox, or Google drive using wget in Terminal or in Google… was originally published in Kobkrit on Medium, where people are continuing the conversation by highlighting and responding to this story.
Using allow_growth memory option in Tensorflow and Keras

· 2 min read
Kobkrit Viriyayudhakorn
CEO, iApp Technology

1

We faced a problem when we have a GPU computer that shared with multiple users. Most users run their GPU process without the “allow_growth” option in their Tensorflow or Keras environments. It causes the memory of a graphics card will be fully allocated to that process. In reality, it is might need only the fraction of memory for operating. It prevents any new GPU process which consumes a GPU memory to be run on the same machine.

Example of three processes which can shared in two graphic cards enabled by “allow_growth” option.

To cove with this, They just enable the “allow_growth” setting in Tensorflow or Keras. The following code for setting allow_growth memory option in Tensorflow.

# Tensorflow  
import tensorflow as tf
config = tf.ConfigProto()
config.gpu_options.allow_growth = True
session = tf.Session(config=config, ...)

And for Keras

#For Kerasfrom keras.callbacks import ModelCheckpoint  
from keras.models import Model, load_model, save_model, Sequential
from keras.layers import Dense, Activation, Dropout, Input, Masking, TimeDistributed, LSTM, Conv1D
from keras.layers import GRU, Bidirectional, BatchNormalization, Reshape
from keras.optimizers import Adamfrom keras.backend.tensorflow_backend import set_session
import tensorflow as tf
config = tf.ConfigProto()
config.gpu_options.allow_growth = True # dynamically grow the memory used on the GPU
config.log_device_placement = True # to log device placement (on which device the operation ran)sess = tf.Session(config=config)set_session(sess) # set this TensorFlow session as the default session for Keras

This increase the graphics cards utilization, not limited the number of process to the amount of card that host machine have. :)

For those whoever want to develop and get consult on creating your own AI model, please getting more information at our company website “iApp Technology” (https://iapp.co.th) and testing our AI demoes (https://ai.iapp.co.th). You can contact me directly at kobkrit@iapp.co.th. Thank you very much. #iApp #Ai

See more at https://iapp.co.th and https://ai.iapp.co.th

Shrink Disk in Google Cloud Platform on Ubuntu With The Smallest Effort Possible

· 3 min read
Kobkrit Viriyayudhakorn
CEO, iApp Technology

Like everyone else, when you creating a disk for an instance, we usually allocate the size of disk much much higher than we actually need. We have a very pessimistic view on a disk space we need, and finally, we end up wasting money on unnecessary matters.

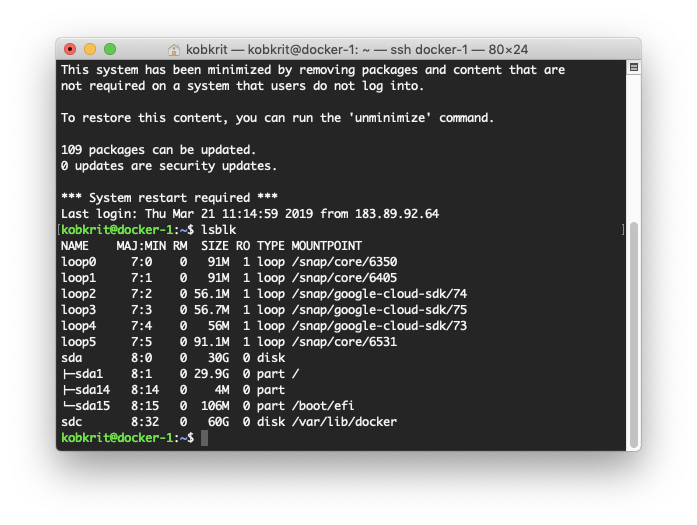
I created an instance on GCP, aimed for running several docker containers. I create an extra 500GB drive located in /dev/sdb (to be mounted on /var/lib/docker) attached to my instance, but actually, an only 60GB drive is needed. The following steps are for shrinking a disk for the unmountable partition.

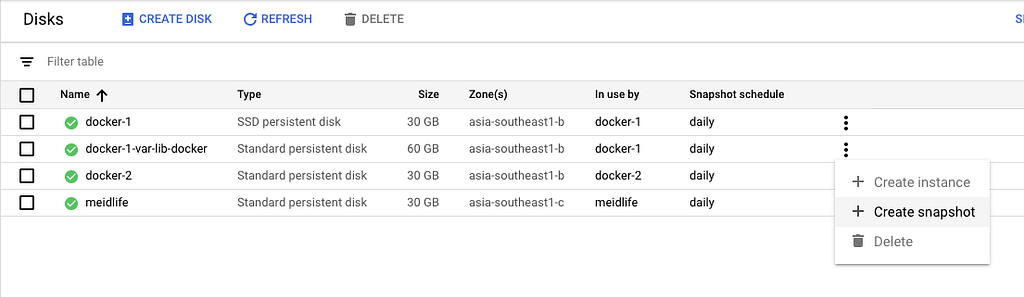
  1. Make the snapshot of a disk for backup in GCP (Actually docker-1-var-lib-docker is originally 500GB)

2. Down your docker in Ubuntu, $ sudo service docker stop

3. Umount the old disk, $ sudo umount /dev/sdb

4. Resize it, $ sudo resize2fs /dev/sdb 60G You need to wait a while.

5. Edit its partition table, $ sudo cfdisk /dev/sdb will give you a text-based gui to inspect your partition table. I would recommend you to print the partition table to a file or screen at that point, and take note of the current configuration as backup. You can then select /dev/sdb and delete the partition. In its place, free space will be displayed. Use new to create a new partition with 60 GB in its place, and set the type to ext4. Then, move to the trailing free space and create the 440GB swap partition with type swap.

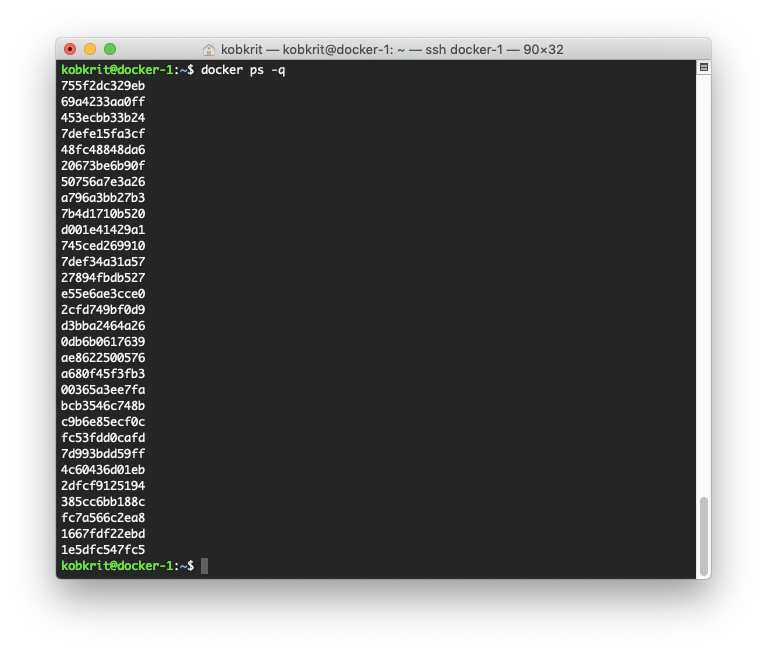
6. Create a new disk in GCP with the size of 60GB attached with the instance. It will be on /dev/sdc, you can view it by $ lsblk (The image is taken after the process is done.)

7. Finally clone the disk, dd if=/dev/sdb of=/dev/sdc (It will take a while)

8. Try to mount /dev/sdc on /var/lib/docker instead of the old disk mount /dev/sdc /var/lib/docker

9. Start the docker service $ sudo service docker start

10. Hooray!, Now everything works with the smaller disk need.

11. Get rid of the old disk on GCP. We do not need to pay from them anymore.

In summary, we unmount a disk, shrink the disk, edit the partition table, and then using dd to clone disk from the old to the new. Finally, mount the new on the old’s mount point and finally, we can get rid of the old disk.

Hope this guide saves your time.

Thank you.

For those whoever want to develop and get consult on creating your own AI model, please getting more information at our company website “iApp Technology” (https://iapp.co.th) and testing our AI demoes (https://ai.iapp.co.th). You can contact me directly at kobkrit@iapp.co.th. Thank you very much. #iApp #Ai

See more at https://iapp.co.th and https://ai.iapp.co.th


Shrink Disk in Google Cloud Platform on Ubuntu With The Smallest Effort Possible was originally published in Kobkrit on Medium, where people are continuing the conversation by highlighting and responding to this story.
[Lecture 1] AI and Deep Learning: Introduction

· One min read
Kobkrit Viriyayudhakorn
CEO, iApp Technology

This Lecture Note is a Colaboratory notebook run on Google Cloud Engine. To open it, you need to register to use the Colaboratory service by login with your Google account at https://research.google.com/colaboratory/unregistered.html.

After that, open the Lecture 1 notebook at:
https://drive.google.com/file/d/1Vibvn4m1cdIc8t0QvxQagNkkfQv76F8i/view?usp=sharing

Don’t forget to click at “Open with Colaboratory” at the top bar.